


Achieving a thriving garden is simple with a drip irrigation system. Ensure precise watering for each plant effortlessly. Set up with drippers, bubblers and an automated timer. Follow these steps for a healthier, hassle-free garden.
Connecting a Sprinkler System to Your Water Line
To install a drip irrigation system, start by connecting it to a water source. Typically, this is your garden hose, but you can also connect it to a rain barrel if available.
Ensure your water source maintains sufficient pressure, ideally above 20 PSI, essential for drip irrigation systems. Install a booster pump if pressure is inadequate. Additionally, safeguard against clogging by employing a filter to remove dirt and debris before entering the tubing, thus optimizing your system’s efficiency.
After confirming water pressure and installing a filter, connect the drip irrigation system to your water source. For hassle-free operation, add a timer to automate watering according to your schedule.

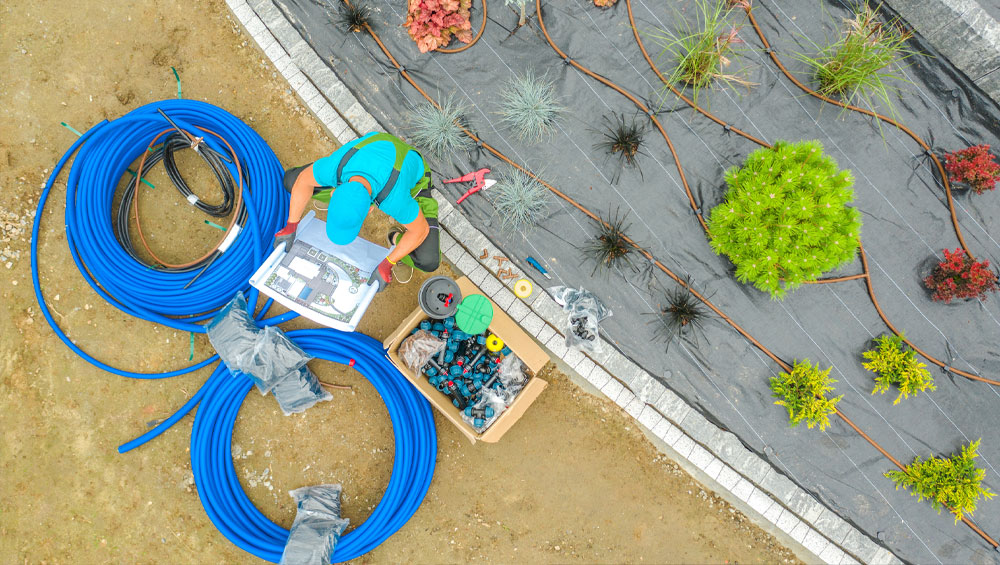
Install ½ Inch tubing for optimal plant delivery
Selecting the appropriate tubing size is crucial when installing a garden irrigation system. Opt for 1/2-inch tubing, ideal for most gardens, as it maintains a good balance of water flow and pressure.
Before starting the tubing installation, carefully plan your garden layout and choose locations for watering devices. This ensures proper tubing placement and sufficient coverage.
Now that your plan is set, commence tubing installation. Connect it to your water source and lay it along your garden’s length. Secure with stakes or clips to prevent shifting.
When laying the tubing, watch out for obstacles like rocks or tree roots in your garden. Adjust the path as needed to ensure smooth operation.
At the end of your garden, seal off the tubing to prevent leaks. Then, attach your watering devices like drip emitters or sprinkler heads to the tubing and adjust the flow accordingly.
Install 1/4-inch tubing to position watering devices
Ensuring proper water distribution to every plant in your garden is crucial. This task can be challenging, especially in large or diverse gardens. Simplify and enhance efficiency by employing 1/4-inch tubing to place watering devices strategically.
Use smaller, flexible ¼ inch tubing to link the main ½ inch water line with individual watering devices. Attach emitters or drippers to the tubing and place them at the plant base.
Using 1/4-inch tubing offers flexibility in adjusting watering device positions as plants grow. Easily adapt to changing plant needs by moving tubing and devices. This efficient method saves time and promotes healthy growth.
Attaching Watering Devices for Your Plants
You have a range of watering devices to attach to your drip system. Drippers deliver water slowly to each plant’s base. Staked bubblers offer versatility, allowing adjustment from a slow drip to a stream for larger areas or pots.
For long rows of plants, planters or window boxes, consider using ¼ inch emitter tubing. It features built-in emission devices spaced every six inches, ensuring even watering for all plants when placed end-to-end in the planter.
Best Methods for Holding Down Tubing
Once the tubing and watering devices are set up, secure them with stakes to prevent movement or dislodging. This ensures the devices remain in position and properly directed.
Automate Your Drip Irrigation with a Timer
Elevate your drip irrigation setup with a timer. Set specific watering times to save time and minimize water usage. Just program the timer and let it manage watering for you.
Experience the convenience of a drip irrigation system with simple installation steps. Promote plant health and save time and money. Try it out and transform your garden.